Saturday, August 12, 2006

Cindy's Savory Stuffed Chicken

This recipe came from a friend of mine. I made it for dinner a couple of weeks ago and my son who likes nothing raved over it. Damned kids.


It's a really easy dish and it's really pretty. Shame my picture doesn't do it justice, but it did have Wow! factor. You'll just have to take my word on that.


Cindy's Savory Stuffed Chicken


4 boneless, skinless chicken breast halves

6 oz. cream cheese, softened just to room temp.

1 tbl. chopped fresh chives

8 pieces of good bacon (don't cheap out here - it's not just for seasoning)

Salt to taste

Pepper to taste


Preheat your oven to 350 degrees.


Rinse your breasts and pat them dry. Then rinse the chicken breasts and pat THEM dry. Ha! Okay, you can skip that first part.


Place a chicken breast between two pieces of plastic wrap and pound with a rolling pin or skillet (don't use a meat tenderizer - we're not pulverizing) until the chicken is about 1/2" thick or so:


Image hosting by Photobucket

Repeat until you've finished all four pieces.


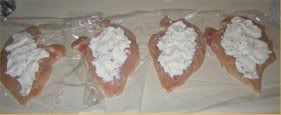
Cream the cream cheese and chives together in a small bowl, then spread the mixture evenly on the 'ugly side' of each breast. (Damn if there's not a dirty joke in there somewhere.) You should wind up with this:


Image hosting by Photobucket

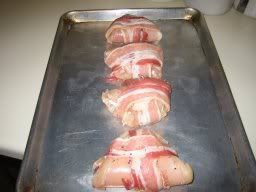
Next fold the chicken breasts over (short side to short side), season very lightly with salt and pepper, then wrap one piece of bacon around the chicken lengthwise and wrap another piece around widthwise. I'm not sure that widthwise is a word, but y'all know what I mean. Be sure you wrap the bacon around the chicken so that the bacon ends will be on the bottom.


Place the chicken on a baking sheet and pop it into the oven.


Image hosting by Photobucket

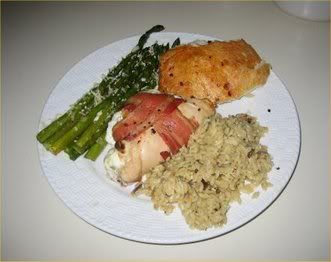
Start testing for doneness at 45 minutes. If the bacon looks done and the chicken juices run clear, it's ready. A little of your cream cheese mixture will ooze out while it's cooking, but don't worry. There's still plenty in the middle.


Image hosting by Photobucket

I realize my plating leaves something to be desired, but hey - you can't have everything.

Tim's Mom's Banana Bread

I don't know Tim or his mom, but he emailed this recipe to me a couple of weeks ago. You are what you eat so let's be bananas. (I suppose I should be glad he didn't send me a recipe for Rocky Mountain Oysters.)


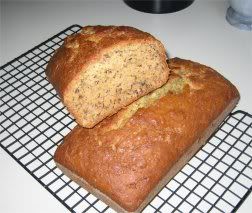
This is probably the best banana bread recipe I've tried. It's moist, it's delicious, it's full of banana goodness. If you have to take a thing that's healthy as it is and add fat and sugar to it, this is really the way to go.


Image hosted by Photobucket.com

Tim's Mom's Banana Nut Bread


3 c. all-purpose flour

1 1/2 tsp. salt

4 large bananas (the riper the bananas, the better the flavor)

4 eggs

3/4 c. nuts (I used walnuts)

1 1/2 tsp. baking soda

3/4 c. Butter flavored Crisco (don't use real butter)

1 1/2 c. sugar

1 1/2 tsp. vanilla


Preheat your oven to 350 degrees. Grease and flour two loaf pans (I used larger loaf pans because that's what I have).


Cream Crisco and sugar together with an electric mixer. Beat in eggs, one at a time.


Mash bananas, then add baking soda to bananas and stir to combine. Add this mixture to the Crisco mixture and mix to combine. Add vanilla and mix to combine.


Sift flour with salt, then mix nuts into the flour. Add this to the banana mixture, again mixing to combine all. Pour an equal amount of batter into each prepared pan and then bake for 60 to 70 minutes. To test for doneness insert a knife close to the center of the bread. It should come out clean.


Lay pans on their sides on a cooling rack and don't remove the pans until they are cool, then tap the pan bottoms lightly to loosen loaves from pans.


Tim's Notes in His Very Own Words: "I have added a little black walnut flavoring to this and it gives it a wonderful flavor. Nuts into flour before going into batter keeps nuts in suspension while baking. And soda into bananas. I can't explain it but it makes a difference."


My Notes: My bananas could have ripened another day or two but I couldn't wait any longer. Even so, this came out wonderfully full of flavor. I considered giving the second loaf to some friends but... well, moving on.


I try not to use specific name brands too often but I'd say to stick with the Crisco on this one. Sometimes store brand shortenings can be a little rancid-tasting. Since the total buttery flavor comes from the butter flavored Crisco I'd personally rather not risk my entire batch just to save a dime.


My bread took 60 minutes to bake.


Thanks, Tim. This one's a keeper.

Cheater's Spaghetti Sauce

Yes, I do buy already made spaghetti sauce in a jar. I’m not Italian, so it’s okay. Actually we treat spaghetti as a quick dinner around here and I know a lot of other families do too. In that spirit here’s a quick way to make the spaghetti sauce from a jar taste a little fancier:

The Cheater’s Spaghetti Sauce

1 large jar of your favorite spaghetti sauce (26 oz. or so)
1/2 lb. sweet Italian sausage
1/8 c. water
1/4 c. sherry
1/4 tsp. sugar (only if needed)

If your sausage came in casings, remove the casings. Crumble the sausage into a skillet, add the water and brown over medium-high heat until the sausage is done and browned. The water will have cooked away by this point so don’t add any more.

Add the sherry and deglaze the pan scraping up all of the brown bits. After the pan is deglazed and the sherry is reduced by at least half add the sauce and then stir to combine. Lower the heat to low and allow the sauce to simmer for 15 minutes, then taste it. Some sauces have more ‘tomato bite’ than others and the sugar helps to tone that down, so add the sugar at this point only if it’s needed. Allow the sauce to simmer on low while you prepare your pasta. If your sausage was particularly greasy you may need to skim a little off the top of the sauce.

Easy-peasy. I’ve tried a million different ways to jazz up jarred sauce but this one works every time and I don’t even have to add other seasonings. The sausage and sherry bring out the flavors better, I guess. Just make sure you start with a decent sauce because you’re not going to make a bad sauce much better with this method.

If you want to make it even better, make the sauce the day before and then reheat it the next day.
Comm

Smothered Chicken

his is a recipe I got out of one of Justin Wilson’s cookbooks. There’s not much to it, but it really turns out delicious and it’s so simple I couldn’t resist sharing. I’ve modified the text a bit and added an instruction or two.

You do cook this chicken until it’s falling off the bones, so be careful when you’re eating it and warn your guests. I haven’t found it to be a real issue, just don’t stuff your mouth.

Smothered Chicken

1 cut up chicken, 2 to 3 pounds at the most
Louisiana Hot Sauce to taste (I used a good tablespoon plus)
2 tbl. soy sauce
Salt, to taste
2 tbl. cooking oil
2 c. chopped onion
1/2 c. chopped bell pepper
1 c. dry white wine
2 tsp. chopped garlic
1/2 c. chopped fresh parsley
Hot cooked rice (enough to serve about four people)

Rinse the chicken and pat it dry. Place the chicken in a shallow dish and season with the soy sauce, hot sauce and salt. Watch your salt usage because soy sauce is already salty. Set the chicken aside.

Heat the oil in a high sided heavy pot or skillet (I used a Dutch oven) over medium-high heat. Add the onions, bell pepper and parsley and saute’ until the onions are clear. Add the wine and stir, add the garlic and stir, then add the chicken and stir again. Lower the heat to medium-low and simmer, covered, stirring regularly, until the chicken is falling off the bones. Serve over hot cooked rice.

See? Nothing to it, but it really turns out delicious.

Chicken & Dumplings

Chicken & dumplings - real stick to your ribs southern comfort food. If I were to say that our family is known for making a particular dish, this is probably the one it would be.


This is one of those dishes that people tend to try to over-complicate by adding unnecessary ingredients. I've also heard of folks using tortillas or canned biscuits in place of making their own dumplings and if you're going to do that you might as well buy canned chicken & dumplings because that's pretty close to what you'll wind up with anyway.


Our recipe has a short, inexpensive ingredient list so not only is this good ol' comfort food but you can feed a crowd on the cheap.


These are heavy dumplings so we don't use baking powder.


The best way to teach someone to make chicken & dumplings is to have them watch and help so they can get the feel for the dumplings, but experienced cooks should have no problem with this recipe. Inexperienced cooks should also give it a shot because it's inexpensive enough and unless you burn your dumplings, it'll still be edible. That wasn't the most encouraging way of putting that, was it? Sometimes you just have to take a leap of faith. Or something like that.


Roll up your sleeves, kids. This one's messy, but worth it.


Kat's Chicken & Dumplings


1 - 4 lb. whole chicken

2 1/2 tsp. salt (plus extra if needed, to finish)

1 tsp. black pepper (plus extra to finish)

5 to 5 - 1/2 cups all-purpose flour (more, if needed)

1 large onion, chopped

2 to 3 chicken bouillion cubes, Better Than Bouillion paste, or homemade chicken stock


Remove the neck and gizzards from the chicken and wash the chicken thoroughly. Place the chicken along with the neck (if it was included - they aren't always) in a dutch oven and cover the chicken completely with water and add the salt and pepper. Don't add the gizzards. Either save them for something else or throw them out.


My 5 quart dutch oven is squatter and wider, so it's not possible for me to completely cover the chicken:


Image hosted by Photobucket.com

I just fill it as much as possible and turn the chicken over once in a while as it's cooking to get the whole thing done.


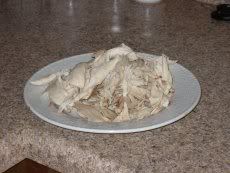
Bring your chicken to a boil and boil it over medium-high heat until it's beginning to fall off the bones; about an hour. Remove from heat, remove the chicken and neck from the broth, and leave all of the broth in the pot. Discard the neck. Cool chicken completely and debone. I like to leave mine in the largest chunks possible because it will fall apart a bit during the second cooking:


Image hosted by Photobucket.com

Place 4 and 1/2 cups of the flour in a large mixing bowl. Add 2 cups of the cooled chicken broth and stir to wet all flour. Your dough should form a ball but be extremely tacky (much like myself). If it's too dry, add broth. If it's too wet, add a little flour.


Pour the remaining flour on a large, flat, clean surface where you can roll out and cut your dumplings. I worked straight on top of my counter and shame on me because that's a good way to cut up your counter tops. You should use a couple of sheets of wax paper.


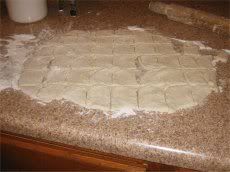
Make sure your surface is very generously floured. Scrape the dumpling dough out onto the surface and knead in as much flour as it takes to give you a smooth firm dough, kneading no more than 25 times or so. Add more flour to your work surface if needed to keep the dumplings from sticking to it, and roll the dough out to 1/4" thickness. Use a sharp knife and cut the dumplings into approx. 2" x 2" squares.


Image hosted by Photobucket.com

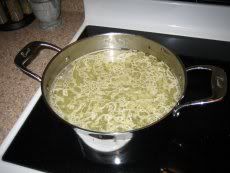
Add enough water (or homemade stock) to your pot to bring the liquid level to just shy of 3/4ths of the way full and bring it to a rolling boil.


Image hosted by Photobucket.com

Once the broth is boiling add the dumplings one at the time, stirring gently after each few dumplings to keep them from sticking. This is easiest if you add them to the center of the pot.


After all of the dumplings have been added, add the onions, bringing the broth back up to a boil. Then add the chicken, bring back to a boil again, then lower heat to medium-low.


The richness of your broth depends on your chicken. Some just taste better than others. Taste the broth. If it's not 'chickeny' enough add bouillion cubes one at a time, tasting after each addition. Add a generous sprinkle of black pepper. Additional salt usually isn't needed if you've used bouillion or Better Than Bouillion. I used a generous spoonfull of Better Than Bouillion in mine.


If you had homemade stock you probably won't need the bouillion boost but you may need a little salt.


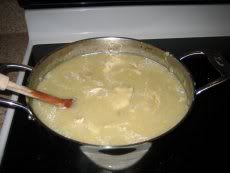
At first your chicken broth will look clear, but as it cooks it will thicken and turn opaque.


Image hosted by Photobucket.com

Simmer, uncovered, over medium-low heat until the onions are completely tender, 30 to 40 minutes. Stir gently all the way to the bottom of the pot occasionally to make sure dumplings aren't sticking.


We serve ours in bowls with cornbread alongside.
Basic Cornbread

Most cornmeal packages come with a cornbread recipe already printed on them, but they’re all just a little bit different. I’ve had a few come out on the bitter side, so this is the one I use because it comes out perfect every time.

Cornbread

1 - 1/4 cups all-purpose flour
3/4 c. yellow corn meal
1/4 c. sugar
1/2 tsp. salt
1 c. milk
1/4 c. cooking oil
1 egg, beaten

Preheat your oven to 400 degrees. Grease an 8 or 9 inch pan, or 12 muffin cups. Combine the dry ingredients, then add the remainder of ingredients and stir just until dry ingredients are moistened. Pour batter into prepared pan or muffin cups.

If baking in a pan, bake for 20 to 25 minutes until light golden and a toothpick inserted in the center comes out clean.

If baking in muffin tins bake for 15 to 20 minutes, until light golden.

Under the Sea Cake

My son asked for a blue cake for his birthday. He also wanted it to be chocolate. Blue chocolate seemed kind of tough to me, so I searched around the 'net and found pictures of "under the sea" type cakes. Here's my version:


Image hosted by Photobucket.com

Is that cute or what??


There's no real recipe here. I used a boxed cake mix (chocolate fudge) and made two layers. I scooped about 3/4ths of an inch depth of cake out of the top layer and poured blue raspberry Jello on top once the Jello was close to being set.


Instead of using frosting between the cake layers I used seedless raspberry jam. That really made for a tasty cake, especially the next day after some of it got soaked into the cake itself.


The little fish are goldfish snack crackers with their smiles painted on with green icing. The grass is made from green fruit roll-ups. The frosting was white chocolate tinted with blue food coloring and the 'sand' is graham cracker crumbs mixed with a little sugar for sweetness. The Spongebob is a candle.


Since this cake has Jello on top it has to be refrigerated but that doesn't affect the texture or flavor one bit.

Port Tenderloin with Port Wine Blackberry Sauce

This is one of the simplest, fastest cooking entrees ever, but it sure is good.

Pork Tenderloin with Port Wine Blackberry Sauce

1-1 and 1/2 to 2 lb. pork tenderloin
Kosher salt, to taste
Fresh cracked black pepper, to taste
2 tbl. olive oil
1/2 c. port wine
2 tbl. butter
1/2 c. blackberry jam

Slice pork tenderloin into medallions about 3/4″ thick. Most tenderloin recipes I see call for the tenderloin to be beaten with a meat mallet but I’ve never found that necessary. Tenderloin cooks fast and is tender, so it doesn’t really matter if the medallions are a bit uneven, size-wise.

Sprinkle both sides of each medallion with salt and pepper.

Turn your oven on to 200 degrees.

Heat 1 tbl. olive oil in a large sautee pan over medium-high heat. This amount of tenderloin will need to cook in two batches, so you’ll need to add the rest of the oil to the pan for the second batch. Cook the medallions approximately 3 to 4 minutes per side, until done. Place the cooked medallions on a platter and place in your oven to keep warm.

Deglaze the pan with the port wine scraping up all the browned bits. Allow the liquid to reduce by half, then add the butter one tablespoon at a time. The sauce will thicken slightly at this point. Now add the jam, stirring constantly until thoroughly heated. Remove the sauce from the heat.

Serve the medallions by plating and passing the sauce over the top.

How easy was that?

A variation on this dish which has a slightly lighter flavor is to replace the port wine with sherry and replace the blackberry jam with cherry preserves.

Banana Split Cake

I got this recipe out of a magazine years ago and unfortunately my memory is shot so I don’t remember which magazine. The important part is that I remember the recipe, though, so yay, me.

The original recipe included banana cake from scratch but as I found out later when I was pressed for time boxed mix works every bit as well and oh, the horror! Truthfully any banana cake recipe will do, box mix or scratch, as long as there is enough batter to make two 8″ or 9″ layers.

Besides being delicious it’s impressive looking. I made it recently for a party at my sister-in-law’s house and I would be posting pictures but I was on the tipsy side so I sort of slopped it together. Lesson: Don’t buildeth thine Banana Split Cake when thou art in thy cups.

One more thing - I’m not generally a Cool Whip fan but it’s good in this cake. Use fresh whipped cream if you’d rather.

Anyway, let’s get on with it.

Banana Split Cake

Banana cake mix baked according to package directions for a 8″ or 9″ layer cake (or banana cake from scratch)
1 8 oz. tub of Cool Whip, thawed and divided into two bowls
1 pint of fresh strawberries, stems removed, chopped to 1/2″ pieces
1 8 oz. can of pineapple tidbits or crushed pineapple, well drained
1 11 oz. jar of hot fudge topping (not the thin, runny chocolate sauce), heated slightly so that it can be poured
1/4 c. chopped salted peanuts

Mix half of the Cool Whip with the chopped strawberries and set aside. Mix the other half of the Cool Whip with the pineapple. Set that aside also.

Take your cooled cake layers and split each in half horizontally so that you now have four layers instead of two. Place the first layer on your cake plate, bottom side down. Spoon the Cool Whip/pineapple mixture on this layer and spread to the edge of the cake but not down the sides.

Place the next layer on top, top side down. This makes it easier to make your cake layers sit straight because the whipped topping/fruit mixture acts like a fluffy cushion. Pour enough hot fudge over the second layer so that it covers the layer and runs down the cake sides - a bit less than half the jar. Sprinkle with half of the chopped peanuts.

Place next layer on top, bottom side down. Top with Cool Whip/strawberry mixture. Place last layer on top, top side up. Pour hot fudge over this layer until it coats the top layer and runs down the sides of the cake. Sprinkle with the remaining peanuts and serve immediately.

This is really good but unfortunately doesn’t keep really well. It can be refrigerated for a couple of days, but I normally only make this for parties so that most of it is eaten as soon as it’s decorated.

Peanut Butter Fudge Cookies

These cookies are based off of one of Paula Deen’s recipes. I think she calls them Magic Peanut Butter Cookies or something like that. Anyway, I was at home while a sheetrock repair was being done and I got bored while waiting, so I thought I’d try making them. Nothing is quite as boring as waiting someone to finish something you have no control over - take my word for that.

Turns out I was a little short on peanut butter (I probably had 3/4’s of a cup) so I added in some peanut butter chips I had left over from another batch of cookies. I was afraid they wouldn’t turn out but they did, and they came out tasting quite a bit like peanut butter fudge, thanks to the chips. I fudged on the name a little. Hopefully Paula won’t care.

These are the simplest cookies I’ve ever made. They would be perfect to make with children because you don’t even need to get your hand mixer dirty. I’ll definitely make them again, except with the correct amount of peanut butter. Add yourself a drizzle of melted chocolate and then you’ll have a batch of peanut butter chocolate fudge cookies.

Peanut Butter Fudge Cookies

1 cup creamy peanut butter
1 cup sugar
1 tsp. vanilla
1 egg
1/2 cup peanut butter baking chips

Preheat your oven to 350 degrees and line a large cookie sheet with parchment paper. If you don’t have parchment paper you’ll need to grease your cookie sheet.

Mix the peanut butter, sugar, vanilla and egg with a spoon until well blended and then stir in the peanut butter chips. Drop by rounded spoonfulls on the cookie sheet 1 and 1/2 inches apart or so and press any mounds down lightly. Bake for 12 minutes, cool for one minute then remove to a wire rack to cool completely. Store in an air-tight container.

This should make approximately 18 cookies. How easy was that?

Food Snobbery & Folks Who Try to Suck the Fun out of Cooking

I’ve been wanting to post something about the snobbery that exists on food-related sites for quite some time now, but I’m never sure exactly how to go about it. I haven’t bothered trying to build up the readership here because of that.

I’m a southern woman - a southeast Texan to be precise, so the diet I grew up with reflects that. Tex-Mex (which we never bother to call Tex-Mex; it’s just Mexican food), Cajun, and simple southern foods are what I grew up on and they’re what I prefer to this day. Feed me a big bowl of black-eyed peas with the pot liquor poured over a hunk of cornbread and I’m in Heaven.

That doesn’t mean that I don’t appreciate other foods. I really like Chinese, Japanese, Italian, French (and the list could go on and on). My own cooking experiences and daily diet center mostly around simple foods, though, and I don’t feel this is something to be ashamed of. How many cookbooks are dedicated to southern style cooking? A LOT. Why? Because it’s GOOD, that’s why, yet some of the people who call themselves ‘foodies’ make a point of putting down the food that I know and love.

I’m not implying that everybody has to like everything; I just don’t see the value in insulting the cuisine (yeah - I said cuisine) of a large population of the United States. If you don’t like it then by all means, don’t eat it, but don’t imply that something is wrong with me because I do. Disdain is not helpful. Or necessary. We should be learning things from each other; not trying to tear each other down.

This probably makes no sense to you regular Kat’s Stuff readers because none of this comes from you, it’s just an observation of mine. I started this site because I wanted to share some recipes. I thought it would be fun and maybe even helpful. I’ve been trying to write them with plain and simple directions so that everybody can play, and I believe I’m approachable enough so that if a person doesn’t understand a thing then they won’t be afraid to ask.

Searching for food blogs to link on this site has left a bad taste in my mouth (ha!). If any of you read any decent, food snob-free food blogs then please slap the links on me so I can check them out.

In the meantime fix yourself some chips and salsa and have a nice, cold, margarita. That’s good stuff and I don’t care who says what.

Good Ol' Ham

Ham is one of my favorite meats but I only eat it a few times a year. Maybe it’s because it seems ‘too special’ to me to just eat any old time. I need to work on changing that because not only is it good as a main course but what’s left over can be used in thousands of other dishes.

This ham recipe is another one courtesy of Surfie at Synaptic Interlude and boy does it sound good! She says you can add a cup of dark brewed coffee to the pan juices to add to the gravy if you desire and let me tell you: you should desire.

If you remove the ham to a warm platter first, turn the heat on under the pan the ham baked in, then add the coffee while stirring up the brown bits you’ve got yourself some red eye gravy. Good stuff, that.

Thanks again, Surfie.

Large Ham Recipe

1 (8-10 pound) fully cooked bone-in ham
As many cloves as you need.
1 (16 ounce) package of brown sugar
1 cup spicy brown mustard
1 cup apple cider
1/2-3/4 cups bourbon (the rest is for you..:)

Trim fat were needed. Make shallow cuts in a diamond pattern. Place cloves in the center of each diamond and where every one sees “fit” to make it “pretty.” I usually do this the night before and let it sit in the fridge overnight, covered, in one of the “throw away” foil baking pans with a cookie sheet underneath.

Mix the next four ingredients and pour over the ham in the morning/afternoon.

Bake on the lowest oven rack at 350 for about two hours or until thermometer reaches 145 degrees. Baste with the pan juices every 20 minutes or so with a brush or baster.

Remove from oven and let cool.

One can also add a cup of dark brewed coffee to the pan juices to add to the “gravy,” if one so desires.

Cholent

This is a Jewish dish. The recipe came from a friend of mine years ago and it has never failed me — my family loves it. The barley is everyone’s favorite part.

Kishke is a sausage that in my friend’s case was made with chicken, chicken fat and so on, but since I’m not Jewish I just use Polish sausage. The flavor of the finished product is exactly the same.

Since this dish has to cook for so long I think it’s easier to assemble it the night before and refrigerate it until the next morning - that way all that’s left to do is to turn the stove on and boil some water.

Cholent

2 lbs. stew meat
1/3 c. barley
1/3 c. dry lima beans
4 medium potatoes, peeled and left whole
1 large onion, chopped
1/2 lb. kishke (or Polish sausage) cut to 3 or 4 inch lengths
Paprika
Garlic Powder
Salt
Pepper

Preheat the oven to 250 degrees.

Place the stew meat evenly across the bottom of a casserole or medium roasting pan that is about 5″ deep. Dump the barley in a little pile on top of the meat on one end of the pan and dump the limas on the other end. Place the whole peeled potatoes in the middle on top of the stew meat.

Sprinkle the onion evenly across everything, add the sausage and season GENEROUSLY with paprika, garlic powder, salt and pepper. Pour enough boiling water in the pan to just cover everything.

Bake for 12 hours. Yes, I said 12 hours.

Add boiling water as needed. It has been my experience that I only have to add water once more about halfway through the cooking time. The resulting dish comes out coated in a gravy (so to speak) but it should just nicely coat everything - not be soupy like a regular stew. Your sausage will look very brown but trust me, it’s not burned, it’s DELICIOUS.

I’m sorry I don’t have exact measurements for the spices. They weren’t provided to me either but that’s never been a problem. Just remember that you’re seasoning a pretty good amount of food. The next time I make it I’ll work out what the exact measurements should be and I’ll update this recipe with them and a couple of pictures.

Seriously, this stuff is good.

Coconut Shrimp with Peanut Dipping Sauce

If you like coconut you’ll love this shrimp — my husband and I made pigs of ourselves eating this one Friday night. It’s times like these I’m grateful that my kids haven’t figured out how good shrimp are.

Since the star of this recipe is the shrimp I’m posting it at the top, but you really need to make the peanut sauce first and let it sit while you’re working on your shrimp.

Coconut Shrimp

1 - 1/2 lbs. of shrimp, peeled, deviened and butterflied
1/4 c. cornstarch
1/4 c. flour
1/4 tsp. kosher salt
1/4 tsp. pepper
1/4 tsp. cayenne pepper
4 egg whites
2 - 1/2 c. shredded coconut
*Peanut oil for frying
Peanut Dipping Sauce (see below)

You’ll need three small bowls. In the first bowl combine the flour, cornstarch, salt and peppers. Put the egg whites in the second one and whisk them until they’re frothy. Put the coconut in the third bowl.

Dip the shrimp in the four mixture first and shake off the excess, then dip in the egg white and finally in the coconut pressing to coat lightly, then place the shrimp in the hot oil and fry until they’re light golden brown. Don’t crowd the shrimp in your skillet (or deep fryer). These cook quickly, so keep an eye on them.

Remove cooked shrimp and drain on paper towels.

Peanut Dipping Sauce

1/4 c. chicken broth
3 oz. coconut milk
2 tbl. lime juice (or more, to taste)
2 tbl. soy sauce
1 tbl. fish sauce
1 tbl. hot sauce
2 tbl. chopped garlic
1 tbl. chopped ginger
1 1/2 c. peanut butter (creamy)

Pulse all together in a food processor or blender until smooth and well combined. This sauce must be kept refrigerated but you should allow it to come to room temperature before serving for best flavor.

You might also try this sauce with spicy grilled chicken.

* Peanut oil isn’t absolutely necessary for this recipe, but it has a higher smoke point so it doesn’t start breaking down as quickly as other types of cooking oils and the flavor is superior, I think.

Quick Veggie Saute'

This was one of those things where I threw together a quick dinner out of what was in the fridge and it turned out so good I thought I’d share it. We had this with roasted asparagus and I’ll tell you what - it was a delicious meal.

(Here is where the picture I took of the veggies in the sautee pan would be if my damned camera wasn’t broken. Feel free to use your imagination.)

I cooked these a bit slower than you would if you were making Chinese-style veggies and just a bit softer than tender-crisp.

Quick Vegetable Sautee

3 tbl. butter
2 cups of fresh sliced mushrooms
1 summer squash, halved and cut into 1/3″ slices
3/4 cup red onion, rough chopped into bite sized pieces
1-1/2 cups of fresh broccoli, chopped into bite sized pieces
1 clove of garlic, minced
1 tsp. grated ginger
1 tsp. teriyaki sauce
Kosher salt to taste
Fresh cracked black pepper to taste
2 tbl. grated parmesan cheese (not the powered canned kind)

Melt the butter in a large saucepan over medium-high heat. Add the mushrooms and cook and stir for five minutes. Add the summer squash, red onion and broccoli and cook and stir until the vegetables are just barely tender, approximately another five minutes.

Add the garlic, ginger and teriyaki sauce, stir and sample, then add the salt and pepper to taste. Continue cooking and stirring for approximately three minutes more, until the vegetables are done to desired consistency. Remove from heat and sprinkle with parmesan.

(Here is where the picture of the finished product plated up should be. Bummer that it’s not, eh?)

Roasted Asparagus

Roasted asparagus is one of those things that’s so easy to fix you’d think directions would be unnecessary but I’m writing this with the assumption that there might, just might be a desperate person out there who doesn’t know how to make roasted asparagus and I’m saving the day.

I’m such a rock star. Well, a rock star without any groupies.

Without further ado (or photos because my damned camera is broken) I give you:

Roasted Asparagus

1 bunch of asparagus, rinsed, * woody ends removed
1 small very thinly sliced shallot
1 to 1-1/2 tbl. olive oil
Kosher salt to taste
Cracked black pepper to taste
2 tbl. grated parmesan cheese (not the canned pizza kind)

Preheat the oven to 400 degrees.

Lay the asparagus in a single straight layer across a baking sheet. Sprinkle the shallot over the asparagus. Drizzle the olive oil over the asparagus and shallot, sprinkle with the kosher salt and pepper and using your hands toss to coat everything evenly.

Bake for 20 minutes. Remove from the oven and sprinkle with parmesan.

*To remove the woody ends from asparagus hold one end of the stalk in one hand and the other end in the other hand. The stalk will break where the woody part ends. Line up the rest of the asparagus and cut the whole bunch at this same length.

Tuna Salad

I know it’s not much of a recipe because anyone can make tuna salad but this is what we’re stuck with for now. Besides, I’m craving a good tuna sandwich and there may well be someone out there who doesn’t know how to make it. Hey - it could happen.

Use the better quality tuna here. You’ll be glad you did.

It may seem strange to use apple in a tuna sandwich but it really does add a subtle flavor and extra crunch. There’s no need to waste what’s left of the apple, either - just slice it up and serve it alongside your sandwiches.

This tuna mixture is also good on crackers.

Tuna Sandwiches

3oz. pouch of solid white albacore tuna or one small can of albacore in water, drained
1 tbl. dill pickle, minced
1 tbl. apple, peeled and minced
3/4 tbl. red onion, minced
3 to 4 tbl. or so of good mayonnaise (NOT Miracle Whip)
1/4 tsp. dried tarragon
generous pinch of salt
pinch of fresh cracked pepper
3 thin slices of fresh tomato
3 slices of your favorite cheese
6 slices of your favorite bread (or only 4 if you’re using an oversized specialty bread)

Flake the tuna into a medium bowl. Add the next seven ingredients adjusting the amount of mayo to your liking - some people like their tuna wetter than others. Mix well.

Toast your bread. Top three of slices with a slice of cheese and melt the cheese in a toaster oven or microwave. Divide the tuna mixture evenly between the other three slices of bread and top with a tomato slice. Top this with the cheese bread and serve.

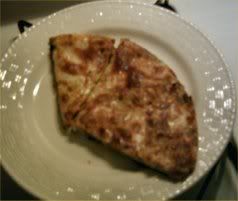
The Accidental Frittata

Okay, it wasn't really an accident. I made it out of some stuff I happened to have on hand and it turned out really good, so why not share?


I'm still keeping the name, though.


The Accidental Frittata


1-8 oz. package of sliced white button mushrooms

2 tbl. butter

1/2 of a 32 oz. package of frozen shredded hashbrowns with red and green peppers

5 eggs very lightly salted and peppered, beaten

1 cup of your favorite shredded cheese


Preheat oven to 325 degrees.


Sautee the mushrooms in an oven-proof skillet in butter over medium low heat until they're soft, approximately ten minutes. Season lightly with salt and pepper and remove from heat.


In the meantime heat a non-stick skillet over medium-high heat - no need to add butter or oil. Add the hashbrowns and spread out flat. Cook approximately 8 minutes per side until lightly browned. Once they're cooked pour them evenly over the mushrooms.


Add the eggs and bake until set, approximately 20 minutes. Add the cheese and bake for five more minutes.


Serves two.

Fried Ripe Tomatoes

Fried green tomatoes are a southern favorite. There's even a movie with that title and if you haven't seen it you're missing out.


What we're making, though, are fried RIPE tomatoes.


We lived with my husband's father in Kentucky for about a year. We moved up in the springtime and Mr. B, my father-in-law, was so excited that we were coming that he told all his friends. His friends welcomed us with fresh sweet corn and tomatoes. Tons of tomatoes. Laundry baskets full of tomatoes. We had the things coming out of our ears.


We ate them fresh sliced for breakfast, lunch and dinner. I made spaghetti and marinara sauces. Mr. B canned some whole ones and also made tomato juice but no sooner would we get rid of a bunch than someone would show up with another.


If you've ever had good ol' home grown tomatoes then you know why we didn't just toss the extras out. They're simply too good to waste and you shouldn't be wasteful with your food anyway.


So, I was looking for a different, easy way to serve them up that the kids might like so I tried frying a couple. They turned out so good that now we prefer fried ripe tomatoes to fried green tomatoes any day.


Fried Tomatoes


2 medium tomatoes, ripe

2/3 cup seasoned dry bread crumbs

4 tbl. all-purpose flour

2 eggs

1/3 cup milk

Pinch of salt

Pinch of black pepper

Cooking oil for frying

Grated parmesan cheese (if desired)


Pour enough oil in your skillet to make it about 1/3 of an inch deep. Heat over slightly higher than medium heat.


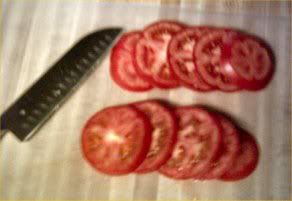
Slice your tomatoes approximately 1/3 of an inch thick.


Mix your seasoned bread crumbs with the flour in a small bowl. Mix the eggs, milk, salt and pepper in another small bowl.


Bread the tomatoes by dredging first in the bread crumb mixture, then coat with the egg wash then dredge again in the bread crumb mixture and carefully place in the hot oil. Do not overcrowd tomatoes. Two tomatoes will make two batches.


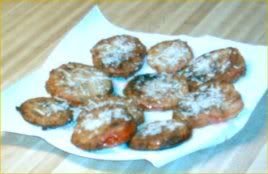
These cook very fast--approximately one minute per side. Remove from oil and drain on paper towels. Sprinkle with a bit of paremsan cheese if desired. I desired:


Serve immediately. These little guys don't reheat well but the upside is that they're so good it's doubtful you'll have any leftovers anyway.

Grilled Tomato Salsa

Food of the Gods, this stuff is. The recipe as it was originally written came from Top Secret Recipes. I found that the directions weren’t exactly clear or accurate and the ingredients needed a little tweaking. Sometimes you can just look at a thing and know it won’t work, you know.

I have a gas grill in addition to my regular ol’ grill so it’s easy for me to quickly grill things but even if you don’t own any type of grill you can still make this salsa. I’ll give the oven broiler directions at the bottom.

Could I have said grill more in one paragraph? I think not.

Grilled Tomato Salsa

6 medium tomatoes, stems removed (Let’s say if each one were diced you’d have 3/4 c. of tomato. Don’t dice them, though.)
3 to 6 jalapeno peppers, stems left on
1 medium red onion
1/4 cup chopped fresh cilantro (loosely measured)
2 cloves of garlic
2 tbl. white vinegar
2 tsp. kosher salt
1 1/2 tsp. Liquid Smoke

Heat your grill to medium. If you don’t have a grill (gasp!) then preheat your broiler.

Coat the tomatoes with olive oil and place on the grill. Allow them to cook for ten minutes. In the meantime peel the red onion and slice it into slightly thicker than 1/4″ slices. Don’t seperate into rings. Brush both sides of each slice with olive oil. Coat jalapenos with olive oil.

After the tomatoes have been on the grill for the 10 minutes turn them over. By now the skins will be peeling and the tomatoes will be getting a bit mushy. They’re supposed to, so don’t worry.

Now add your onion slices and jalapenos to the grill. Allow everything to grill another 10 minutes. You’ll need to turn the onions once and you’ll need to turn the jalapenos periodically to lightly blacken the skins all around. By this time the tomatoes will be starting to blacken in a few places too, so don’t freak out. If your onions aren’t as soft as you like them then feel free to grill them a bit longer if needed.

Remove everything from the heat. Let everything rest for a bit so that it’s cool enough to handle.

The thing about jalapeno peppers is that you never know exactly how hot they are until you try them. There are also tons of myths on where the heat is. Well, I have news. The entire pepper has some heat to it, but the real heat is in the veins inside that the seeds are attached to — not the seeds themselves.

Pull the stems off of the jalapenos and tap any loose seeds out. Slice the peppers open and remove as many seeds as possible (who wants to bite into a bunch of seeds?) and rough chop them. If there is any skin that’s overly black you can remove that but don’t fuss over the rest.

Add your chopped jalapenos to a food processor* and pulse to puree, then remove jalapeno puree from the food processor and set aside. Don't wash the processor.

Remove the skins from the tomatoes and cut 'em into quarters. Rough chop the onion and add that to the food processor along with the rest of the ingredients excluding the jalapenos and pulse a couple of times. The idea is to have the salsa be a little chunky. Pour the salsa into a large bowl and start adding the jalapeno puree. Add it a little at a time, stir it in real well, taste, and add as much as needed to reach the desired heat level.

* Note: If you don’t have a food processor this can be pusled in a blender in very small batches or you can use kitchen scissors and snip everything up and mix it in a bowl. Obviously the food processor is easiest method but you have to work with what you’ve got.

To make this is the oven: After coating your tomatoes and onions in oil place them on a broiler pan. Place the pan on a rack that has been lowered 6" from the heat source, then broil your onions, tomatoes and jalapenos for 20 minutes. Turn the veggies over halfway through broiling so that they'll brown (or blacken, as will be the case for the jalapenos) evenly.

Once everything is done proceed with the recipe as written.

You can serve this warm or chilled. I prefer it warm, and most restaurants around here are now serving it warm also. It really brings out the flavors.

Variation: Omit jalapenos and Liquid Smoke. Puree a few chipotles in adobo sauce and add them a little at a time to your salsa until you hot it up enough.

Store this in the refrigerator for up to five days or freeze it. This makes some of the best damned salsa you’ll ever eat. And you can say you made it yourself.

Chicken Fried Steak & Cream Gravy

Southern comfort food at its finest. This stuff will make your butt two axe handles wide if you eat it too often so save it for a once in a while dinner and you'll do fine. I believe someone once said that gravy makes the world go 'round.


Okay, no one has ever said that, but someone should.


This is one of those recipes that I learned how to make so long ago that I don't pay attention to measurements. I'll do my best to make them as precise as possible and if you have any questions just ask.


Chicken Fried Steak


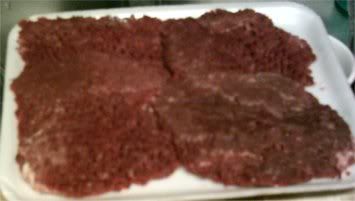
1 lb. package of cube steak (do not use round steak)

Cooking oil (enough so that it's about 3/4 of an inch deep in your skillet)

2 eggs

1 cup of milk

2 cups all purpose flour

1/2 tsp. salt (plus extra for the steaks)

1/2 tsp. pepper (plus extra for the steaks)

1 tsp. of your favorite all purpose seasoning blend (Tony Cachere's, Tex-Joy, Lawry's, etc.)


First lightly season the cube steaks with salt and pepper. Stir the eggs and milk together in a shallow pan. Mix the flour, salt, pepper and seasoning blend together in another shallow pan.


Heat your oil over medium heat. Be sure it's heated thoroughly before adding your breaded steaks. You can test this by flicking a drop of water into the pan. If it pops and sizzles then it's hot enough.


Dredge each steak in the flour mixture, then coat in the egg wash, then it's back into the four mixture again, then into the hot oil they go.


Cube steak cooks pretty fast, so six minutes per side or so should do it. I usually let mine cook for a couple of minutes and then turn them over so that the crust is browned enough to hold together and I just turn them as they need it. You can test for doneness by poking them with a fork--you'll see blood if they're still raw.


Drain on paper towels.


Cream Gravy


1/2 c. cooking oil

1/2 c. flour

Milk - I can't be precise here, but plan on having at least 2 cups

Salt to taste

Pepper to taste


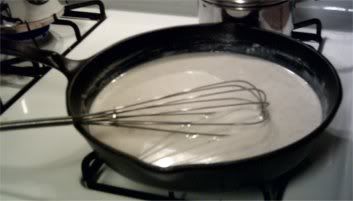
Heat your cooking oil over medium heat. Once it's hot add your flour and cook and stir, scraping the bottom constantly for two minutes. The idea is to remove the flour-y taste without browning your roux.


Now add your milk in a slow, steady stream. Using a whisk makes this part a bit easier and helps cut down on the lumps, but if you don't have one it won't hurt anything. Immediately turn the heat down to low and keep stirring.


Coook over low heat and add more milk as needed until the gravy reaches the consistency you prefer. If you accidentally add a bit too much milk turn the heat up a little and the gravy will thicken back up. If you add way too much milk then it's back to the ol' drawing board.


Add salt and pepper to taste. Traditionally cream gravy is heavy on the pepper so be generous with it.


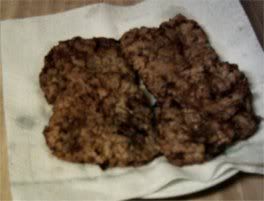
Here's the finished product:


I know the pictures are awful. I really am working on that.

Nancy's Easy Etouffee

Nancy is my mother and this is her recipe. This is one of those quickies that makes a good, stick to your ribs dinner without too much prep work or thought, really. Comfort food.

I know a lot of people are demonizing cream of mushroom soup these days, but using it as a shortcut once in a blue moon isn’t going to hurt you one little bit. Besides, this is good food. Trust me.

Nancy’s Easy Etouffee

2 tbsp. butter or margarine
1 large onion, chopped
1 bellpepper, chopped
1 clove of garlic, minced
1 lb. raw shrimp or crawfish tails, peeled and cleaned, or chopped cooked chicken
1 can of RoTel tomatoes, undrained
1 can of cream of mushroom soup
1/4 tsp. cayenne pepper
Salt and black pepper, to taste
Cooked rice to serve over

Melt the butter in a large, heavy skillet. Add the onions and bellpepper and sautee until tender. Add the garlic and sautee for one minute more. Add your meat, RoTel tomatoes, cream of mushroom soup and cayenne and simmer over low heat for 30 minutes, stirring occasionally. Add salt and pepper if needed.

Serve over rice. How easy was that?

Robin Makes Fried Rice

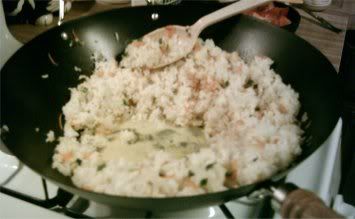
Robin is my husband. I snapped a photo or two of him making said fried rice, but they turned out awful so we're just going to have photos of the food. These turned out equally as awful but I don't have to worry about bruising the fried rice's ego because it looks irritated that someone was in its face snapping pictures.


Before I get into the list of ingredients I'm going to tell you this this is a loose estimate of things you'll need. A little more butter, soy sauce or veggies won't hurt a thing. Fried rice is extremely versatile and can be turned into a meal in itself if you add shrimp or chicken and bok choy (or whatever you like) but this version is just a quickie that's meant to be served with something. We served sweet and sour pork over ours.


Robin's Fried Rice


3 cups of cooked long grain rice*

3 tbl. butter

1 tsp. sesame oil (not necessary if you don't have this on hand, but I like the taste)

1/2 tsp. minced garlic

1 large or 2 small eggs, lightly beaten

1/2 cup chopped green onion

1/2 cup shredded carrots

2 tbl. soy sauce

Ground black pepper to taste


This is easiest to do in a wok but a skillet will work also. Melt the butter in your wok or skillet over medium-high heat. Once the butter is melted add the garlic and sautee for fifteen seconds or so.


Add the carrots and green onion and sautee for one minute.


Next add your rice and sautee for another minute or two.


You'll notice that it begins to give off a nutty aroma. If you're using a wok push the rice up the sides of the wok so that you have a clean cooking surface at the bottom. If you're using a skillet then remove your rice to a platter for a moment. Add the egg to the bottom of the wok (or skillet) and scramble quickly.


I wish that picture had come out a little better and that I'd waited a few seconds to snap it so you could see the egg scrambling. That's the breaks, I suppose.


Chop the egg into little bits as you scramble it, then mix your rice back in. If you're using a skillet add your rice back to it and mix with the egg. Begin adding the soy sauce a little at a a time while stirring quickly - this only needs to cook about two minutes more. The soy sauce will turn your rice a light brown color. Taste, and add more soy sauce as needed. Add black pepper to taste and remove from heat. You normally won't need to add salt because the soy sauce provides enough salty flavor.


A very good, simple side dish that only takes minutes to prepare can be the main course with a little tweaking. Tasty stuff that's easy on the waistline. Unless you're a carb counter, and boy, have you ever landed at the wrong web site.


*One cup of raw rice makes 3 cups prepared.

My Very First Fried Chicken

Where’s the fun in having a kitchen blog if the bad stuff is all neatly swept under the rug, or shoved down the garbage disposal, so to speak? None at all, really. Be honest. Other people’s mishaps are entertaining. Plus you get the benefit of learning from someone else’s stupidity.

Back when I was extremely young and married to my first husband (that sounds so Elizabeth Taylor, doesn’t it?) we were broke and starving which is what a lot of extremely young married people are. I think it’s all those stupid songs about livin’ on love and that kind of crap.

Anyway, our cupboard was bare except for a very few staples like salt and pepper and flour. Have you ever tried salt and pepper flour balls? No? Then you haven’t lived. Or you’ve lived better than me. One of those.

My husband decided he wanted fried chicken for dinner and since he’d finally found a job we had a little food money. (Is it just me, or are you hearing Loretta Lynn faintly in the background? God, but I hate country music.) He stopped off on his way home from work the day before and bought two whole chickens and the rest of the stuff I’d need to make a fried chicken dinner.

Now, my mother hadn’t taught me how to cook anything that wasn’t “add water and stir” and in her defense she really hadn’t had time to. I was only 15 years old. (Cue ‘Dueling Banjos.’) So, here you have a completely inexperienced cook making her very first real dinner ever, and of all things it’s fried chicken.

I knew I’d probably need most of the day to accomplish this great task, so me and a stripper named Bobbi got started early afternoon working on those chickens. You’re probably wondering what a 15 year old girl was doing with a stripper named Bobbi in her kitchen and all I can tell you is hell if I know. I can’t remember every little detail, can I?

The first problem was the whole chickens. Bobbi and I unwrapped and washed them and stood there with our hands on our hips for a few minutes staring at those chickens trying to figure out what to do. Bobbi finally took the bull by the horns or rather the chicken by the legs and started cutting. The first thing she did was split the chickens in half down the breast. This couldn’t possibly be right because now all we had was just four big pieces of chicken so she turned ‘em sideways and split those pieces again, cutting across the breast. Now we had eight big pieces of chicken that didn’t look quite right.

I got in on the action then and started telling her where to cut and before you know it we had two whole chickens cut up into the weirdest looking pieces you’ve ever seen. Then it was time to move on to breading them.

We got a couple of bowls out and put flour in one of them and an egg and milk mixture in the other one. We seasoned the chicken with salt and pepper then I dunked the chicken pieces in the egg wash, then in the flour, then back in the egg wash, then back in the flour and then I put the chicken pieces on a plate because that’s what Bobbi said I was supposed to do. It seemed right at the time.

Finally I got all the chicken pieces battered and got out a skillet and filled it up with cooking oil. I turned the flame on high and by the time the oil had heated up a funny thing had happened. I had what now appeared to be a big papier mache’ looking blop where my chicken pieces used to be.

No matter. I pulled those gloopy, sticky chicken pieces apart and fried them one by one which was a very quick process because of the high heat and all. Before I knew it I had a platter full of golden-brown, fried chicken with about 1/2 an inch crust on the outside of each piece. Each piece that was leaking pink. Pink means raw.

Then I got upset. I knew I couldn’t put the chicken back into the oil because it would burn if I tried to cook it any longer. Next came the tears and out went Bobbi, leaving me alone in my time of need. I was really upset, too, because my husband was an asshole. I just knew he was going to rip my head off for that because this meant we’d be going hungry for dinner again.

I was beside myself and I panicked. There was only about fifteen minutes before he was due home from work and since I couldn’t think of anything better to do I went out to the pond at the back of the trailer park (yes, I said trailer park) and had myself a good cry and waited for the screaming to begin.

But it didn’t. I waited and waited. I knew that way more than fifteen minutes had gone by, by then. Eventually I heard footsteps and I knew it was him. I braced myself and got ready for the ass-chewing.

Instead he patted me on the back and asked me what was wrong; why wasn’t I at home? I started apologizing about the chickens and he just laughed and said he’d already fixed them and that I’d just messed up by cooking them with the heat up too high and that they were perfectly fine. That’s probably the first and last truly nice thing that sorry bastard ever did for me.

It was a bit of a lie. The chicken was edible but that 1/2 inch crust was… Well, different and weird, much like the chicken pieces themselves.

The moral of the story is don’t get married when you’re 15 and strippers named Bobbi don’t know a damned thing about making fried chicken.

Jalapeno Pie

I made two of these this past weekend for an early family get-together so if I was more on the ball I could have taken pictures. Since I’m not, oh well.

Jalapeno Pie

Pickled jalapeno slices - enough to line the bottom of a glass pie pan
6 eggs, beaten
5 cups of shredded cheddar cheese

Preheat oven to 350 degrees. Line the bottom of your pie pan in a single layer of jalapeno slices. Mound cheddar over jalapeno slices. Pour eggs over cheese as evenly as possible and bake for 40 minutes or until center is set.

Serve by cooling slightly and cutting into squares. Even people who don’t like hot stuff usually like this simple appetizer because the peppers can be picked off of the bottom which removes the heat but keeps the flavor.

Why people don’t like hot stuff is beyond me, however, but hey, do what you want.

Crawfish Cornbread

This is a very easy dish to make and is always a hit at parties. In fact, if I don’t act quick enough I usually don’t get more than a bite. Maybe it’s just the hogs I’m hanging out with or something.

A few quick notes: I use frozen crawfish tails because it’s easier and they’re available year-round. Rinse them thoroughly and then soak them in water with Tony Cachere’s for about 15 minutes before proceeding with the recipe. Drain and rinse again. No need to boil these because they’re already cooked - just give them a little chop if you like. Sometimes I don’t bother chopping them at all.

Tony Cachere’s is actually a ’season-all’ type of seasoning that has red (cayenne) pepper in it so if Tony’s isn’t available where you live just use your favorite all-purpose seasoning and add enough red pepper to it to give it a kick.

This recipe calls for fresh jalapenos which I have access to in abundance around here (Houston, Texas) but if you can’t get fresh then canned jalapenos will work. You’ll need about a tablespoon of chopped pepper. The dish comes out spicy and flavorful and it’s one of my favorites.

Crawfish Cornbread

1 lb. crawfish tails, boiled and chopped
2 c. shredded cheddar cheese
1 stick of butter or margarine, melted
1 tsp. salt
1 can creamed corn (15 oz.)
1/2 c. chopped onion
1/2 c. chopped green onion
1/2 c. chopped bell pepper
1 pkg. Jiffy Cornbread mix (the little 8-1/2 oz. box)
3 eggs
1 tsp. baking soda
1 tblsp. Tony Cachere’s Creole Seasoning
2 jalapeno peppers, chopped

Preheat oven to 350 degrees.

Mix all ingredients well and pour into an ungreased 9 x 12 pan. Bake for 45 minutes or until done in the middle. If a toothpick inserted into the center comes out clean then it’s done. If it’s not quite ready allow it to cook longer and check on it in 5 minute intervals.

We’ll be having this with our Christmas Eve munchies. Yummy.

Toll House Cookies

I’d planned on going all out with a recipe accompanied by photos but I haven’t started my Christmas baking yet because I’m still working on the Christmas shopping part. I did buy lots of chocolate chips, so at least that’s a start.

What I’d like to share is a chocolate chip cookie technique that a woman I know ran across by accident. We’ll start with a typical toll house cookie recipe:

Toll House Cookies

2 1/4 cups all-purpose flour
1 teaspoon baking soda
1 teaspoon salt
1 cup (2 sticks) Fleischmann’s margarine *
3/4 cup granulated sugar
3/4 cup packed brown sugar
1 teaspoon vanilla extract
2 large eggs
2 cups (12-ounce package) semi-sweet chocolate chips
1 cup chopped pecans

Melt the margarine, granulated sugar and brown sugar together in a small pot. Allow mixture to cool completely before proceeding. Once the mixture is cool add the vanilla.

Preheat your oven to 375 degrees while you’re waiting on your butter/sugar mix to cool.

Combine the flour, baking soda and salt in small bowl. Add your cooled butter/sugar mixture to a large bowl. Add eggs one at a time, beating well after each addition. Gradually beat in flour mixture. Stir in chocolate chips and nuts. This mixture will be gooey so don’t worry. Drop by rounded tablespoonfulls onto ungreased baking sheets.

Bake for 9 to 11 minutes until golden brown. Cool on baking sheets for two minutes then move to wire racks to cool completely.

These cookies come out chewey, moist and glossy-looking.

A little tip: You can substitute white chocolate chips for the chocolate chips and macadamia nuts for the pecans and these are equally as yummy.

Another little tip: Parchment paper is worth it’s weight in gold. Besides the fact that it makes clean-up a breeze it’s also wonderful because you can load up sheets of parchment paper with your cookie dough and as the cookies come out of the oven you just slide off one loaded sheet and replace it with another. Very cool. I know a lot of people are using silpat but you have to wash those. Unnecessary washing is the devil.

* Don’t substitute anything for the Fleischmann’s margarine because it won’t work as well. Real butter will do in a pinch, but the result just isn’t the same.

test

test, test